■ Software Preparation
| If you are a new Kittenblock user, please make sure to click the link here first to install the program editor. 🔗Click the link |
■ Connect to the main control board
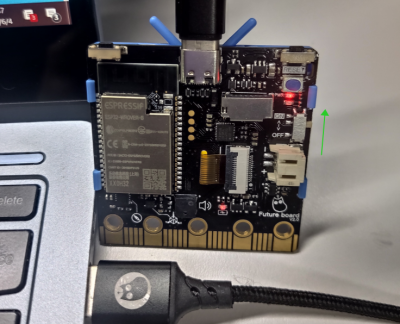
There are two steps connecting to the board: first to use USB-C to connect the Future board hardware-wise, then connect the serial port in the software.1. hardware connection

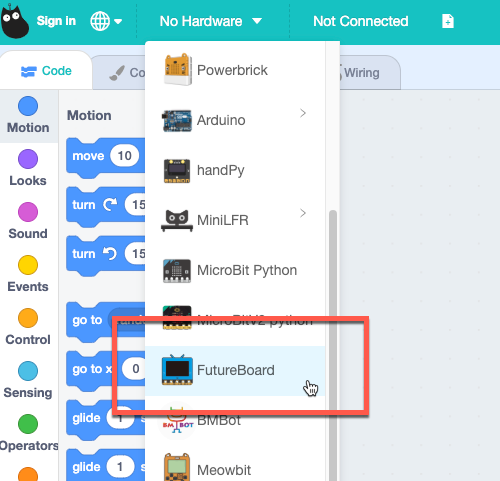
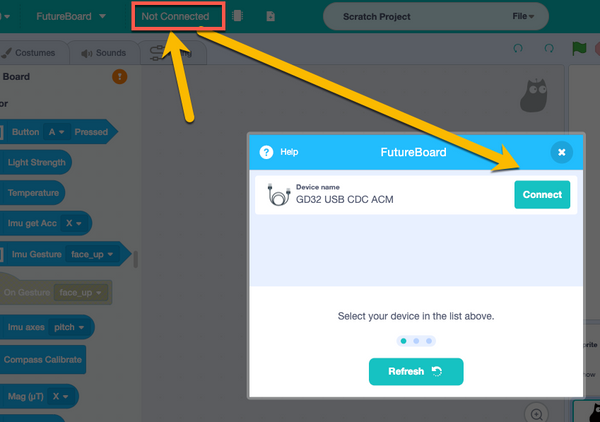
2. Choose hardware - serial port connection


| If there are problems like cannot find the serial port or connection failure, please refer to the ❓ help center |
■ Online Interaction
After connecting the serial port successfully, you can control the Future board by clicking the blocks, which enables you to see the return value of some sensors and the interaction of the sprites on the stage.Drag the buzzer block from the section on the left, click the block, you can hear something from the Future board.

■ Program Upload
When you need to run programs on the Future board disconnecting to the computer, you need to upload the program to the hardware first. On booting, the Future board would check files of the main.py format in the file system, and run the programs in them.
| Uploading programs in fact is to transfer the written program to the main.py in the file system by copying. |
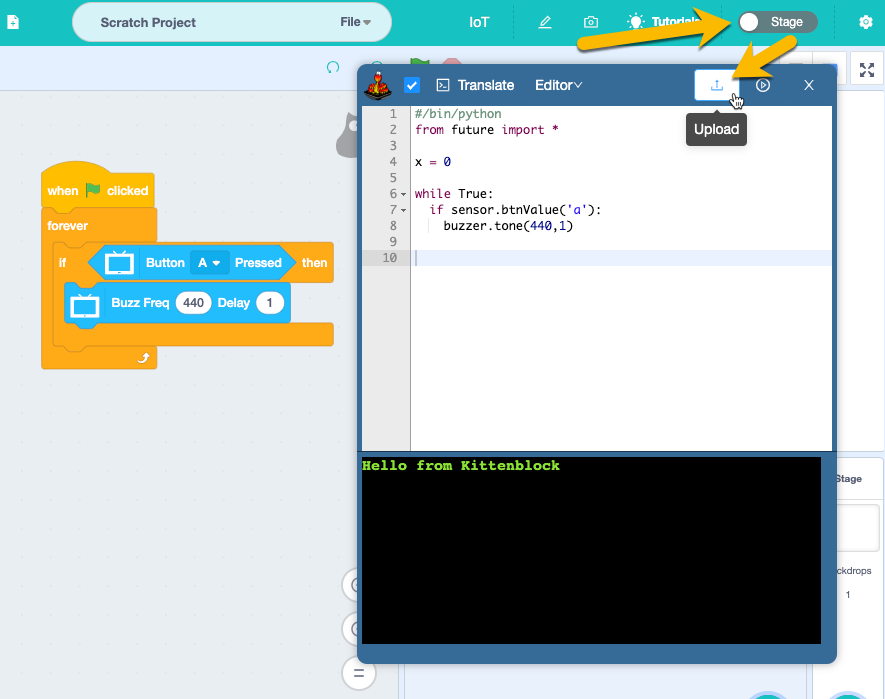
Write a simple program to use button A to control the buzzer to sound. Find the Switch to Coding on the upper right corner and switch it to the coding mode. Then click upload, wait till it has uploaded successfully. 
If you have any question, please feel free to contact us at Discord, we will always be there to help.
KittenBot Team

